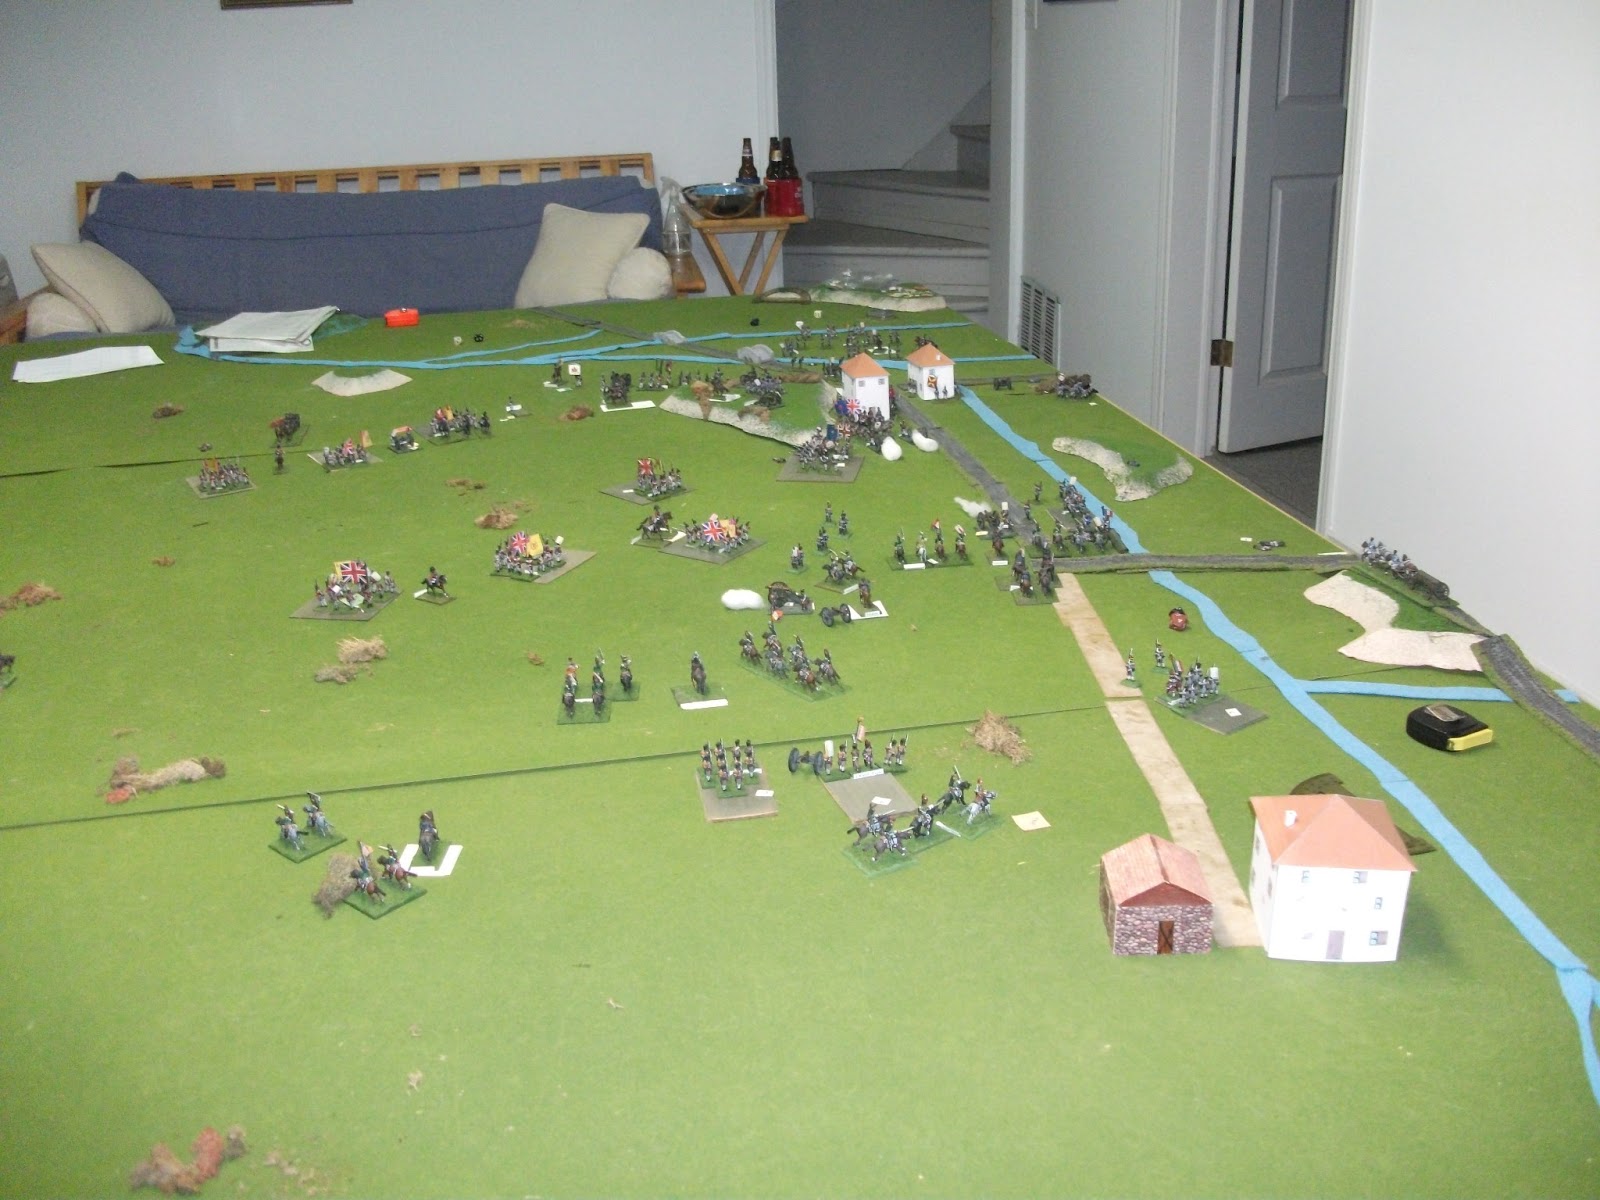
After much too much terrain building we finally started the Battle of Queenston Heights seven months after its two hundredth anniversary. The scale is 28mm using figures from Knuckleduster, Front Rank, Perry metal/plastic, Victrix metal/plastic, Hinchliffe and Redoubt.
The rules are General de Brigade with a steadily building War of 1812 addendum.
Here are some photos of the battlefield and environs;

This is Queenston Heights looking across the Niagara River towards the American redoubt called Fort Gray, which contains an 18 pounder gun.

The village of Queenston with two flank companies of Lincoln and York Militia by the church.

A different view - beyond the church the 49th Grenadier Coy and a glimpse of the First Lincoln 9 pounder garrison gun facing the beach.

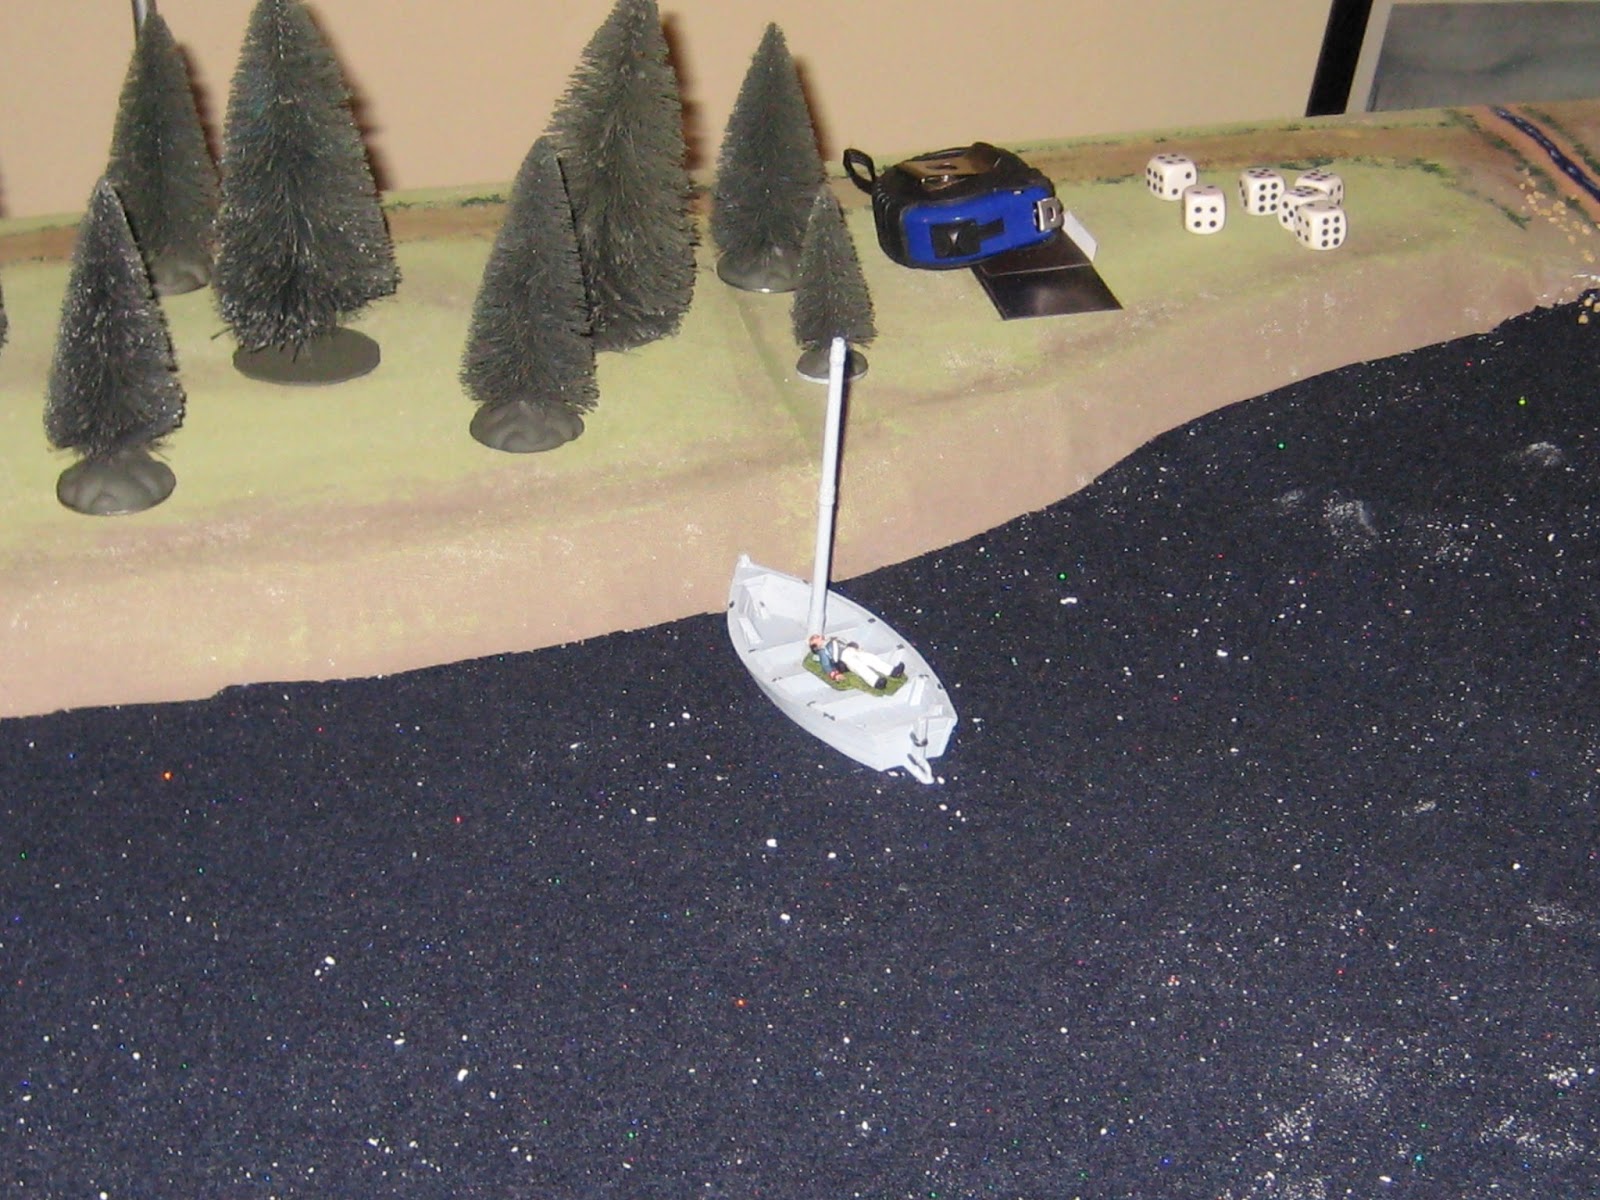
Looking north along the Niagara at the American embarkation area with boats at the ready and a glimpse of the 8 inch mortar nearby. On the left, the entrance of the ravine hat leads up behind the redan.

Looking south on the American embarkation area with the 8 inch mortar at the top left.

Looking south with embarkation area left and Queenston and the beach are to the right and beyond the heights and the redan.

Some sedentary militia 3rd York guard the dock at the Hamilton house
The first casualties - all 40 Americans are wiped out by the 9 pounder...the boat crew manage to get the dead and dying back to New York shore.

The U.S. 13th lands on the narrow shore ledge in the dark, which forces them into skirmish order while the 49th Light Coy pour fire into the Americans from high above.

Major Lovett directs fire from Fort Gray's 18 pounder.

Left - the U.S. 23rd lands in the redan dead zone while the rest of the regiment embarks. The American 8 inch mortar provides supporting fire.

The U.S. 23rd advancing up the heights in the dead zone below the redan while to the left at the ravine the 13th suffers more casualties from the 48ths Light Company.

The Lincoln 9 pounder fires into the American landing force from behind a stone wall while the Lincoln and York Flank Companies guard the buildings.

Major-General Van Rensalaer and LCol Fenwick inspire the 23rd Infantry as they embark.
However, Brigadier General Wadsworth's Seventh brigade of New York Militia is frustrated as they have not been issued their ammo supply and it is unlikely to arrive until 0730.

The U.S. 13th is forced to retreat and is annihilated by combination of earlier fire from the garrison 9 pounder and a charge from the 49th.

The 13th's retreat affects other Regular Brigade units and ultimately leads to Brigade morale failure and the invasion stalls temporarily.

On the completion of the 49th Gren Coy charge it fails a formation test and falters. There is a temporary tactical pause below the heights.

Both sides recover and recommence the battle.

The 23rd regroups in the dead zone below the Redan's 18 pounder while the 49th prepares to repulse the American advance yet again.

With morning twilight about to change into a sunrise at 0620 the Americans feel like they are re-starting the invasion again. They have suffered heavy casualties and have lost a boat that they can't afford to lose. However, the British and Canadian Militia have lost men too. Men that they can't afford to lose as re-enforcements are unlikely for hours yet.