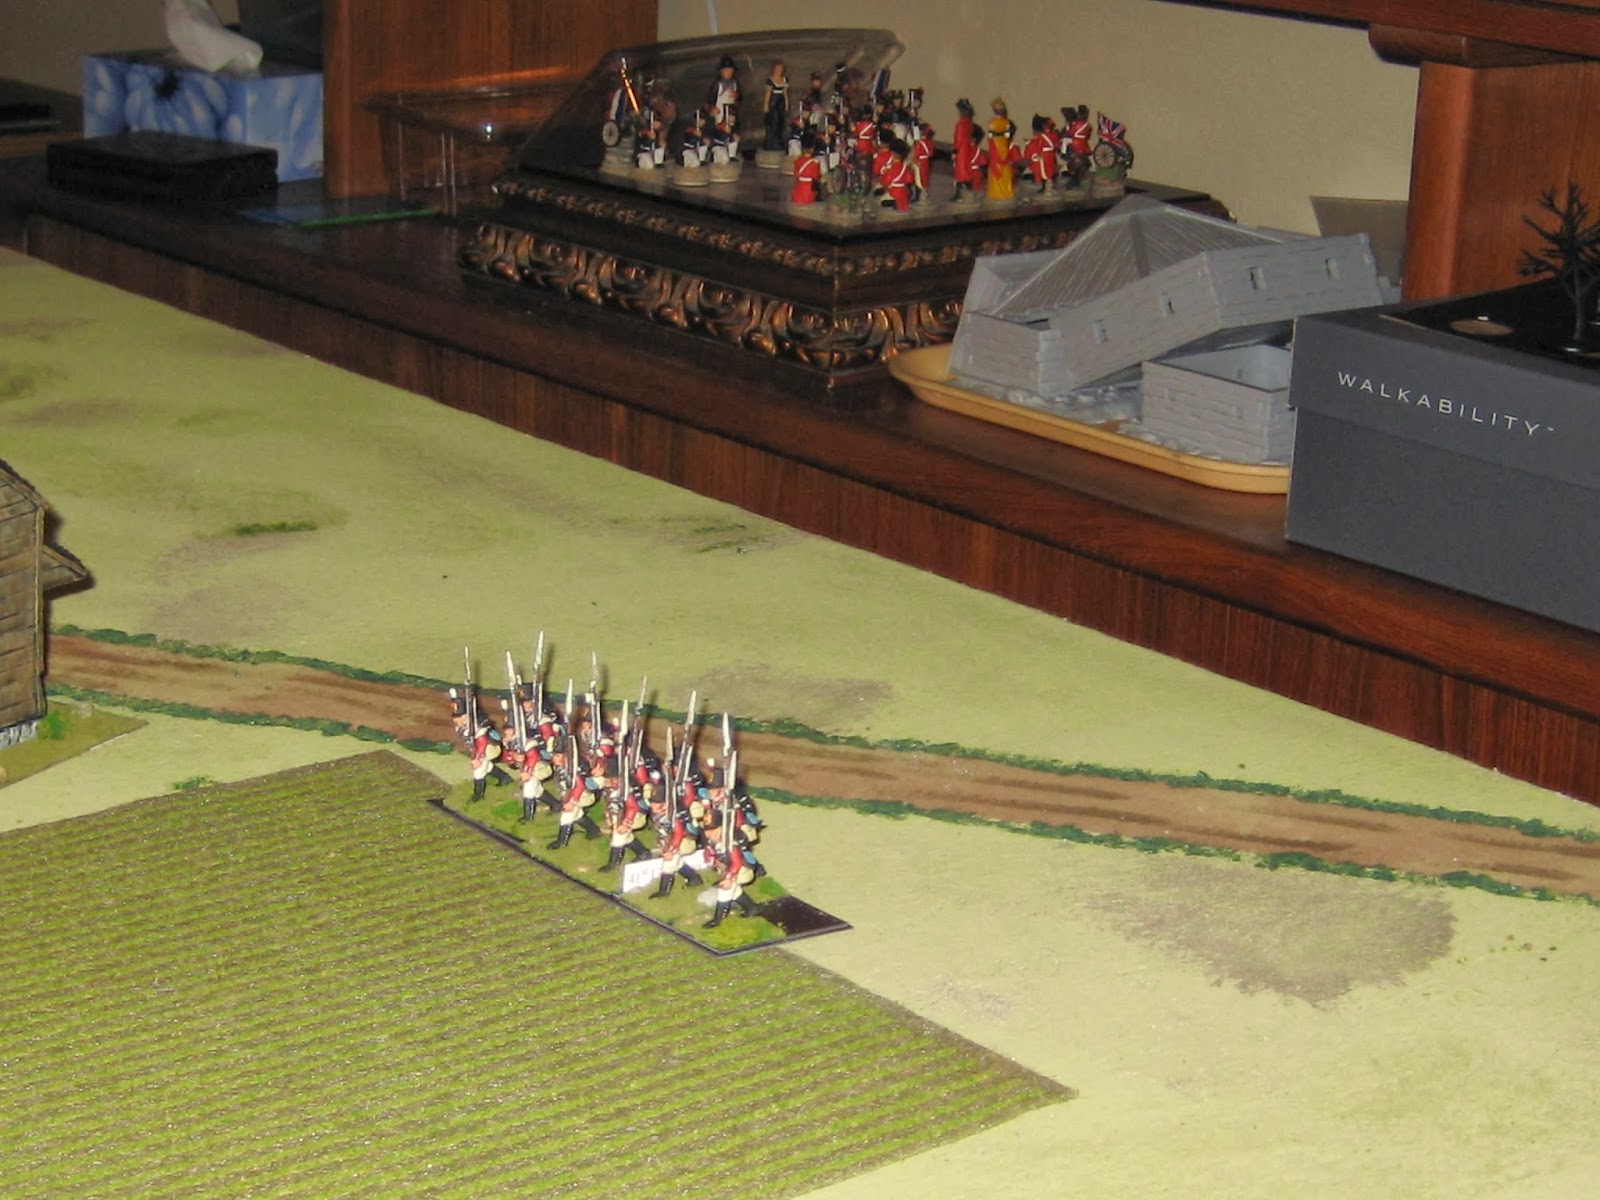
We played two more turns up to #7 the other night. Things remain pretty static on the French left, where the Spanish continue to put their final touches on their graduation parade.
Meanwhile, Debelle's Brigade have been pushed back even further after the Provisional Chasseurs showed that they still have all of the wrong stuff and bounced off of the KGL Hussars. The latter decided to celebrate by falling back into the woods for a picnic, but the British have now broken through the French right flank and are threatening to turn the whole position. What will happen next?
Sunday, 8 February 2015
Monday, 2 February 2015
THE BATTLE OF CARRION, TURN 5
We completed three more turns last week. On the Allied right flank, the Spanish continued their practice for the up-and-coming Dos de Mayo parade as can be seen in the photo below.
In the meantime, the Allied left tried to force a crossing of the river and had limited success. Their infantry were thrown back but their cavalry won a surprise victory against Debelle's hard-luck brigade. Here is the photo at the end of Turn 5.
It will be interesting to see if the British can exploit the success of their cavalry and turn the now-exposed French flank or whether the French will be able to regain their balance and throw back this assault as well as they await the possible arrival of reinforcements.
In the meantime, the Allied left tried to force a crossing of the river and had limited success. Their infantry were thrown back but their cavalry won a surprise victory against Debelle's hard-luck brigade. Here is the photo at the end of Turn 5.
It will be interesting to see if the British can exploit the success of their cavalry and turn the now-exposed French flank or whether the French will be able to regain their balance and throw back this assault as well as they await the possible arrival of reinforcements.
Sunday, 25 January 2015
THE BATTLE OF CARRION, 1809
We began the Battle of Carrion two weeks ago. It is a fictional battle depicting what could have happened had Sir John Moore decided to attack Marshal Soult's exposed II Corps after the battle of Sahagun. In this battle, Soult has taken up a defensive position around the town of Carrion while he awaits possible reinforcements. He has two infantry divisions and a cavalry division, along with his corps reserve artillery.
Moore's army consists of three British infantry divisions, a reduced cavalry division, and a large mixed division under Romana. They spread out and begin their advance towards the French position. Here are the photos from the first night after two turns.
Friday, 23 January 2015
Battle of Chippewa - Phase Three
A much delayed report of the final phase of this game.
The British Commander decided that he could not win the battle and capitulated. The moderator was hoping that he would conduct a defensive withdrawal across the Chippewa River. However, a fighting withdrawal is the most difficult tactical undertaking. Still, as the regular infantry of both sides were not engaged it would have been most interesting to see them clash. But it was not to be.
The following photos represent the end state of the battle.
The left of the British line anchored by a howitzer. Then the 1st Foot and the 19th Light Dragoons.
The 24 pounder has lost most its crew (one of the main reasons for the British capitulation) while the 6 pdr causes some damage to the Doodles.
MGen Riall looks over the battlefield while the 8th Foot await a possible American advance.
The 100th Foot are successfully engaging the American Indians. No doubt the 100th will shortly dispatch the Indians with a bayonet charge. The left wing of Scott's brigade is in the background.
LCol Pearson's Light Brigade (Light Coys, Lincoln Flank Coys and Norton's Mohawks) have continually pushed back Porter's militia and Indians.
Now to the extreme U.S. left flank. We see that Porter has rallied the New York Militia and brought them forward to engage Norton's Mohawks (upper left). Could Porters reinforcements turn the tide of battle against the British or will they arrive too late?
The battered and much reduced 5th Pennsylvanians await Porter's reinforcements. They are somewhat comforted by having a regiment of Scott's Brigade on their right flank. It seems Red Jacket's Six Nation warriors are so far holding their ground in a fire fight with the 100th Foot (mid right).
The American 9th and 11th Regiments supporting Red Jacket.
In the foreground left is BG Scott and to the right MGen Brown with the 25th regiment in front of them. The American 6pdr(left) and howitzer (right) have taken a toll of the British 24pdr.
On the American right flank. On the road both the 12pdr and 6pdr continue to cause more casualties particularly to the British 24pdr. The U.S. Light Dragoons take shelter behind a farmhouse. All four American field guns have been in action for a few turns and are causing casualties to the British force.
The British commander is unwilling to commit his infantry to the battle until the American artillery is neutralised. As MGen Riall believes this can't be done he capitulates to MGen Brown.
A great game, particularly for Rod (Pearson's Light Brigade) and Steve (Porter's Militia Brigade) in the woods. The battle in the woods started with a solid American advance and was countered with the arrival of Pearson's combined Light Companies. Person's Brigade drove Porter's almost back to their start point. However the arrival of the New York Volunteers may have turned the battle in the woods.
Our next game is at Paul G.'s and will be a early Peninsular battle.
Monday, 24 November 2014
Battle of Chippewa Phase Two
Riall's left flank. A RA 5.5 inch howitzer engages and American 6pdr down the lake shore road. To the rear the 19th L.D are in support. To the right of the house is 1st Foot 'Royal Scots.
On the left the big 24pdr gun and 6 pdr blast the American gun and infantry. The Americans take some casualties.
In the woods Pearson's Light Brigade are steadily pushing back the American Indians and Militia.
The Lincoln Militia Flank Companies are forcing back the Pennsylvania Volunteers.
The reverse view with Norton's Mohawks giving the American Volunteers flanking fire.
Scott's Brigade taking casualties fro the British guns.
While the British are content to hold their present position and engage in an artillery duel, MGen Brown orders up the L.D. and divisional artillery.
Brigadier-General Porter arrives at the American camp in the hope of rallying the N.Y Volunteers to join the remaining elements of his brigade who are heavily engaged with Pearson's Light brigade.
In summary the main part of the battlefield has settled down to an artillery duel while Pearson's Light Brigade has been steadily pushing back Porter's Indians and Volunteers. It remains to be seen if Porter can rally his remaining militia units and perhaps go on the offensive against Pearson's Light Brigade.
Saturday, 25 October 2014
The Battle of Chippewa
Battle of Chippewa, 5 July, 1814
After a sojourn of three weeks since the Battle of Vimeiro we started the Battle of Chippewa using General de Brigade Rules with a War 1812 addendum.
The Situation
On the British/Canadian side Paul M. as Major-General Riall commanding the main force of 1st Foot, 8th Foot, 19th L.D. and artillery consisting of a 6 pdr, 24 pdr and a howitzer (an unidentified unit is in reserve) and Rod as LCol Pearson commanding the Light Brigade consisting of combined Light companies of the 1st, 8th and 100th; 2nd Lincoln Militia, Grand River Indians and Norton's Mohawks.
On the American side Paul G takes the role of Major-General Brown and First Brigade Commander, Brigadier-General Scott while Steve is Brigadier-General Porter commanding the New York Volunteers and a large Seven Nations warriors horde led by Red Jacket.
This battle started with Porter's Brigade (actually half the brigade the rest are in camp) pushing back and engaging the 2nd Lincoln Militia and Grand River Indians in the wooded areas. After a few turns Pearson's Light brigade joins this fire fight in the woods.
While the engagement in the woods is developing, Riall sent his brigade across the Chippewa River with the aim of attacking Scott's Brigade, which is hopefully still encamped on the south side of Street's creek. At the same time MGen Brown has been observing the progress of Porter's Brigade mopping up the annoying Canadian Militia and Indians. From his position on the lake shore road, Brown is surprised to observe a significant British force coming down the road toward him. Brown immediately dispatches his aide to bring forward Scott's Brigade without delay.
After about ten fast turns the following photos represent the Phase One end state.
Riall's left flank on the shore road with a 6pdr and howitzer on the road. In front of the guns is (l to r)the 1st Foot, 24 pdr and 19th L.D. In the distance Scott's Brigade is deploying.
In the woods to the right of Riall's main force, is Pearson's Light Brigade. From left to right; Grand River Indians, Light Companies, 2nd Lincoln and mid upper right is Norton's Mohawks working around Porter's left flank.
In center the 8th Foot is formed in line along the fence marking the edge of the woods. The 8th can hear a lot of musketry and so appear to be protecting Riall's right flank. To the right Porter's and Pearson's brigades are heavily engaged.
Brown's aide having already passed the commander's orders to Scott, appears to ordering more unnamed units forward.
No Man's Land. Looking west, the British to the left and the American's to the right.
Looking north-east; Porter's and Pearson's brigades are heavily engaged. Bottom left, Norton's Mohawks are working their way around Porter's left flank. However, the N.Y. Volunteers have wheeled left to receive the Mohawks.
Ropes' coy (21st) are still by the house while an American howitzer and six pounder unlimber near the lake. At the same time the 11th regiment is marching along the fence line while the 25th is crossing Street's Creek. To the left Scott and Brown Observe.
Another look at the same area with American Light Dragoons to the left of Scott and Brown.
Summary
Porter's and Pearson's brigades remain heavily engaged in the woods. The main British force under Riall looks prepared to unleash its guns at Scott's brigade as it moves into position along the rail fence. In support, the American 6pdr and howitzer are about fire on the British.
Phase Two bodes well for a major clash between the two main brigades.
Until next time, which will no doubt be sustained by beer and pretzels.
Sunday, 26 January 2014
Queenston Heights Redux - Final Moves
The game started at twilight with visibility reduced to 24 inches for two turns and a final turn at dark with the visibility down to 12 inches. Clearly the American forces are holding/clinging on to the heights but the British/Canadian Brigades under Brock had increased the pressure and it was matter of perhaps four to six turns with good visibility that Americans may have been forced off the heights. As it was the Americans managed to hold on to most of the heights and the British held on to Queenston. So, as the objectives achieved were a draw, it came down to casualties. As the Americans suffered more than a 10% differential, the British/Canadian forces were declared the winner.
The following photos represent the end state at dark.
Holcroft's battery moves closer/canister range to the remains American Seventh Brigade, which is at the redan.
The American Seventh N.Y. militia Brigade flanks the 18 pdr gun.
The 49th Flank Coys slowly move up the escarpment in an attempt to outflank the American regular brigade with what is left of the Light Artillery Infantry Battalion. In the center, the Lincoln and York Flank Coys move up to engage the LA Inf frontally while the Mohawks keep the 2nd Artillery Infantry and the 13th Inf pinned.
A couple more turns and this situation could turned for and American disaster as both the U.S. 13th and 23rd Inf were in a FALTER. This is one the few situations when Indians can attack a formed infantry unit. In the center bottom The 1st/4th Lincoln and Runchey's militias support MGen Shaeffe's engagement while the 41st (bottom right) takes heavy casualties from the American 6 pdr.
Crowther's 3 pdr is supported by the Cayuga's are anchoring MGen Sahaeffe's right flank.
Another view of the U.S. 6pdr that is anchoring the Regular brigade's right flank on the edge of the woods.
As a result of fierce fire fight with the Chippewa Brigade, Hopkins's Rifle volunteers suffered more than 50% casualties and they failed a morale check and routed, which necessitated a brigade morale check. The Sixth Brigade of N.Y. Volunteers failed their brigade morale check and were forced to retreat as a broken brigade.
As a result of the aforementioned fire fight the Lincoln Flank Coys routed causing morale checks for the remaining units. The 41st remain firm, however....
The Kent Militia Rifles are FALTERD.
A view of the Redan and the U.S. Seventh Brigade N.Y. Militia looking toward Holcroft's battery on the move.
Sadly, I must now de-construct the battlefield.
Next time we are conducting the peninsular Battle of Vimeiro.
Subscribe to:
Posts (Atom)